< SnodCraft.com

Archive for the ‘SnodCraft News’ Category

SnodCraft Ornaments

Tuesday, February 20th, 2018

You may have noticed that the shopping cart is no longer available on the site.  In 2015 Bob passed away and without his talents and scroll saw use, I have removed not only the shopping cart, but all of the previous scroll saw designs.  SnodCraft, however is still in business and with the help of others, the precision carved ornaments on high quality cabinet grade wood, are still available at the Coeur d’Alene, Idaho Christmas store.  Coeur d’Alene is a beautiful place to visit, or if you are lucky, perhaps you live close by.  Either way, I hope you get the opportunity to visit the store.

Most sincerely,

Donna

Signs and Plaques

Friday, April 18th, 2014

Campfire Sign

SnodCraft is always discovering creative folks with ideas for signs and plaques.  One of our favorite things is to turn their ideas into reality.  This carved sign was made for a church summer camp.  The camp has a lot of wooded areas, plenty of places for campfires, and always toasted S’mores through the summer months.  Who better than Smokey the Bear to remind everyone to tend their campfires.

Speaking of forest and trees, we are delighted with the response to our “Into the Woods” line of carved ornaments, as well as our carved Christmas ornaments.  Year round Christmas stores and RV resorts are discovering the rustic textures and hand-painted finishes of our carved ornaments.  If you’d like to request a special sign, plaque, or find out how to order re-sale ornaments, contact us at customerservice@snodcraft.com. for details.

Happy SnodCraft shopping!

 Donna

You Too Can Be An Artist!

Wednesday, July 13th, 2011

blog ready artist pixEver wonder how the artist draws the design or scene onto a wooden shape, canvas, fabric or watercolor picture? Little artistic talent is needed to reproduce a patterned design onto your favorite painting medium and SnodCraft would like to offer a few helpful hints to disperse any artistic fears you may have.

Begin your artistic venture by searching for pattern books. There are dozens of artists who have published their own individual style in books or pattern packets. There’s a wide range of subject matter available and you are sure to find something that interests you. Start in your local craft store for pattern books, or without leaving your armchair, browse through the SnodCraft internet links: Di Hiller Productions or Artist’s Club. Another source on-line is Vikings Woodcrafts (Vikingwoodcrafts.com). Whether you are looking for whimsical designs, picturesque landscapes, flowers, animals, gardens or whatever the subject, there’s plenty from which to choose. When browsing through pattern books try to “think outside the box”. Perhaps part of a landscape pattern really catches your eye, or perhaps you’d prefer the moose all by himself instead of next to a bear, or you love a design found in an acrylic or oil pattern book, but would rather paint it in watercolor, or on glass. Let your imagination take over! Keep in mind should you find a Di Hiller design on her site, you can order our Paint-It-Yourself wood kit to match the pattern you have selected.

How does the pattern get transferred to your art project? The key word is “transferred”. You’ll need “transfer paper” and “tracing paper”, which are both available through the links mentioned above, or at your local craft store. By the way, NEVER use regular carbon paper to transfer a design! Carbon paper will bleed through paints, smears, and will ruin your painting! Transfer paper on the other hand contains no wax or grease, erases like pencil, won’t smear, washes out of fabric, and can be used again and again. It comes in several colors – black, white, and blue. White and blue transfer papers are recommended for tracing onto dark surfaces; black is recommended for most light papers, canvas, or wood surfaces.

Let’s get started –

Step 1: Lay the tracing paper over the pattern or just the part of the pattern you wish to use and carefully trace the design onto the tracing paper using a No.5 lead mechanical pencil. Trace as much detail as you feel you’ll want in the finished project. Tracing paper can tear easily so be careful and don’t apply too much pressure with your pencil.

Step 2: Place the tracing atop the wood, canvas, watercolor, or fabric. It is imperative your tracing is placed exactly where you want the finished painting, so take your time and place it with care! Once you have it placed, lightly tape it down with a small piece of blue painter’s tape. Now gently slide an appropriate sized piece of transfer paper under your tracing and begin following the trace lines. If you are transferring onto a shaped wood piece you can often omit some of the trace lines, apply some base coats and then trace the remaining details after the paint dries. However, if you are tracing a landscaped scene, add all your trace lines since it will be difficult to line it up to the same position a second time. Recommended tool for transferring the traced lines is a thin pointed stylus tool (available at your local craft store). Again, be careful following the lines so you don’t tear the tracing paper or dent the wood with your trace lines.

Step 3: Once you have transferred the pattern, remove the transfer and tracing papers. Your project is now ready for paint.

Here’s an idea – There are several fun-to-use paint mediums available: if painting on fabric look for special fabric paints or use the standard acrylic paints but add a “textile medium” which makes your project more durable and washable. If painting with watercolor try the “masking medium” which when applied leaves those places white while you add color all around them. You later remove the masking medium with an eraser when all is complete. If painting with acrylic paints try using Deco Art’s “Canvas Gel”. It allows you to blend and paint as if you were using oil paints. Or, if painting with oil try adding a small amount of sand to your paint. This adds texture and depth. You’ll feel like an artist with each creative attempt.

If you would like a particular painting question answered,use our Contact link on the Home page. We’d love to hear from you!

Happy Painting!
blog ready paint brushes

The Art of Shadows and Highlights

Thursday, June 23rd, 2011

blog ready artist

There are a few tricks to shading/floating on craft projects and SnodCraft would like to offer some helpful hints. Few pieces leave our shop without shading; even the birdhouses get light contrast shading under eaves, over windows; even around hand painted trees and shrubs. Magic happens when you add shading to your craft projects and the key to mastering it is lots of practice – well worth all efforts!

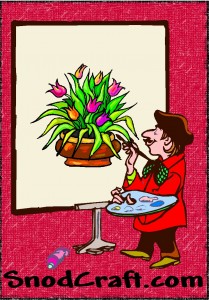
Where to add shading you may ask. If you are following a pattern most artists will mark the area to be shaded, or they will tell you in the instructions exactly where to add shading. That will take the guess work out of where to shade. However, the basic rule of thumb for shading is simple – any area touched by light always has a contrasting shadowed area. Envision where the light source is and then float a shadow on the opposite side. Another rule of thumb: Every shadowed area should have a highlighted area. Lets say you float a shadow under the fingers opposite the light source (see picture), then the next step is to float a highlight on the top of the fingers. Slightly darker paint color than the original skin color for the shadow; a slightly lighter color or an off white color for the highlight. As I said, magic happens!blog ready shading pix

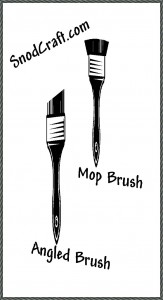
The first step in mastering a good float is in the paint brush. SnodCraft recommends a high quality angled brush made for acrylic paints – don’t skimp on your brush purchases! Trusted brand names in brushes: Loew/Cornell, Golden Taklon, and Papillon. (Papillon is an exclusive brand name available through our Artist Club link). Angled brushes come in varied sizes. Our favorite size is a 3/8″ angled brush because it fits into small spaces; works well in the larger areas plus provides the desired control we prefer, but try various sizes until you find the size best suited to your needs.blog ready brush pix

Getting started – have at the ready: clean water, a slightly damp soft rag, paper towel and palette paper or a plastic paint tray. Wet your angled brush in the clean water and drop the extra amount of water onto your palette paper or tray. Blot the brush on the paper towel to remove any excess water and then place the longer tip of your brush into the paint and pick up a very small amount of paint. Mix the paint with the water on your palette paper or paint tray. Apply pressure and “work” the paint into the brush tip until an even mix of water and paint appears. If the mixture seems too thin add a small dab of paint; if too thick add more water. The heavier concentration of paint should be on the tip of the brush with little if any paint showing on the short angle of the brush. If too much paint has worked into the short side, squeeze the excess out with your finger tips. Once you feel comfortable with the blended mix of water and paint, float your shadow. If you are not satisfied with the floated brush stroke remove it quickly with your damp rag. Adjust the mixture in your brush – water to paint ratio, and try again. If the float appears too light for your tastes, let it dry and do another application – layering your floats will give you a softer more dimensional effect. Some crafters prefer to pre-moisten the painting surface with water before floating and then use a mop brush to soften the float instead of removing it with a damp rag. Relax and try each suggested method and then stay with the one that works the best for you. Again, the key word is practice!

Happy Painting!blog ready paint brushes

Getting Creative with Stencils

Saturday, June 4th, 2011

blog ready stencil remake

Ever wonder the best way to apply a stencil?

Whether you are doing a stencil application on a wall, or craft project, SnodCraft has a few helpful hints.

Prepare before starting your stencil project.

Make sure your surface is clean and dust free, measure out stencil placement. If applying lettering, stencil on a blank sheet of paper to check measurement and spacing. Practice your stenciling on a piece of paper before beginning your project if this happens to be your first experience with stenciling. Once you know exactly where you want the stencil to go on your project and feel secure with the “how to”, then secure the stencil to the surface with blue painter’s tape, or stencil spray adhesive. We recommend a round bristle stencil paint brush – pick the size brush that corresponds with the size of your project. We do not recommend the use of a craft sponge brush since the sponge tends to hold too much paint which will then bleed under the stencil. There are stencil paints available, however we recommend Deco Art Americana,  Folk Art, Apple Barrel or Martha Stewart acrylic paints, all available at craft stores.

Start Stenciling.

Pick up a small amount of paint with the stencil brush using a dry stencil brush. Pounce (straight up and down movement) the brush bristles onto a paper towel removing the majority of the paint. This minimum amount approach keeps paint from bleeding under the stencil and ruining your project. Next pounce the brush and “paint” the stencil design. It is always better to pounce several light coats, and then continue with more light coats until you are satisfied with the look. Allow each layer to dry before applying a second application of paint, which is another reason to use the recommended acrylic paints – they dry very quickly. If your stencil design requires more than one color be sure to use a different dry stencil brush for each color.

If you are considering a stenciling project we hope this bit of information has been helpful. Use our Contact link on the Home page for any questions or comments. Happy painting!

blog-ready-paint-brushes1